

Motivation
I have grown to love ESPHome for simple sensor nodes for around the house, so following my smart home dream I realized what I needed was a low-cost ESP32 dev board equipped with Ethernet.
Looking at what was available on the market, I only found expensive solutions:
- wESP32 : Full PoE support, but bulky and expensive
- Olimex ESP32-POE-ISO : Also bulky, although cheaper than wESP32
- Misc ethernet boards on AliExpress: Cheap, but no PoE support
I realized what I needed was not available, and I wanted to learn a bit more about ethernet, so I decided to build my own! And thus begun my journey into custom ethernet…
Design
The requirements I set out were:
- Based on the ESP32
- Compact
- Castellated edge connector
- Low cost
- Built-in ethernet PHY
- PoE support
ESP32
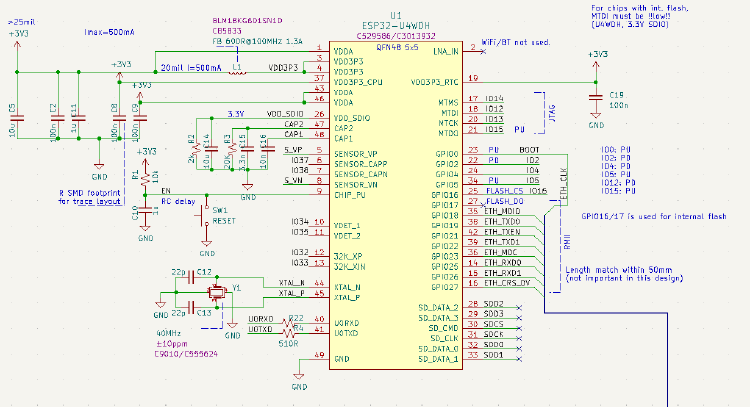
I decided to go with a standalone ESP32 chip rather than a module such as the Wroom, to keep the board size down. Speficially I chose the ESP32-U4WDH with built-in flash.
WARNING: THERE ARE TWO VARIANTS OF ESP32-U4WDH
One has a single core and does NOT work with ESPHome/Arduino, while the other has dual core, and BOTH HAVE THE SAME EXACT PART NUMBER!!!
Seriously Espressif, I am NOT happy about your choice of naming.
Aside from that, the rest of the design follows the Wroom32 reference schematic:
Ethernet
Since the ESP32 has a built-in MAC, you can connect a number of ethernet PHYs, provided the code supports it:
- LAN87xx (used by wESP32)
- KSZ80xx
- RTL8201
- IP101
I settled on the RTL8201, as the LAN8720 was out of stock at the time, and also more expensive. The RTL8201 can be obtained cheaply from LCSC.com (~$0.40)!
Here is my implementation of the RTL PHY, after scouring the datasheet and studying other people’s designs:
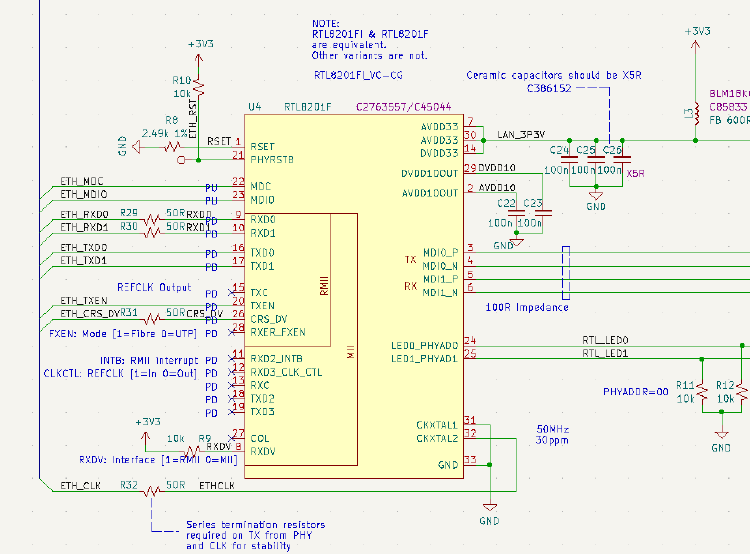
Most importantly I found that you need series resistors (33R or 50R) on the RMII signals to ensure signal integrity. I found that some of them could be omitted however. Everything else “just works”!
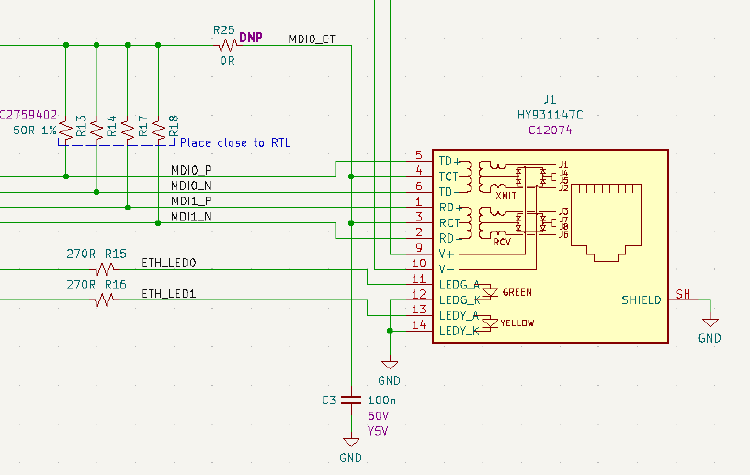
For the connector, I found one with integrated magnetics and PoE rectifiers, to help keep the board size down:
RMII
The ESP32 supports the RMII interface (Reduced MII), which is a simplified version of MII with reduced pin count and a 50MHz clock.
It consists of the following signals:
| Signal | Description | Direction |
|---|---|---|
| TX[0,1] | Transmit data | ESP->PHY |
| TXEN | Transmit enable | ESP->PHY |
| RX[0,1] | Receive data | ESP<-PHY |
| CRS_DV | Carrier Sense / Data Valid | ESP<-PHY |
| REFCLK | 50MHz reference clock | ESP->PHY |
| MDIO | SMI data | ESP<>PHY |
| MDC | SMI clock | ESP->PHY |
The timing of the reference clock is critical and so all RMII signals (excluding SMI) must be length-matched, though for my design here the board is so small that this isn’t an issue.
Fortunately you don’t need to understand how RMII works here, except that it’s just a transparent and standardized way of sending raw ethernet data to a PHY.
PoE
For PoE, things get a bit trickier as there are many ways to achieve this.
For full 802.3at PoE you are supposed to have a transformer with isolation, but this increases the complexity and cost of the board, so I opted to go for a simpler buck converter design with a single inductor.
I lose the isolation so are no longer compliant with the specification, and will be more limited in terms of power delivery, but for my requirements this is not a problem.
The wESP32 uses the Si3404 chip to handle PoE negotiation, and I opted to use the same here. The datasheet of the Si3404 actually shows how to implement a buck converter:

Here is my full implementation of the Si3404 chip:
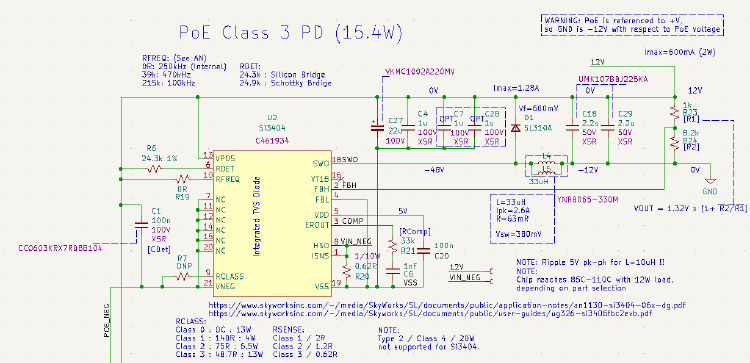
It’s important to note that the Si3404 is referenced to +VPOE, so GND is not at 0V relative to the PoE power source! (Rather it is VPOE - 12V, where VPOE is usually 48V)
3.3V Power
I have settled on using the LV2842XL buck converter for most of my projects, as it is simple to wire up, flexible, and provides enough current to power the ESP32.
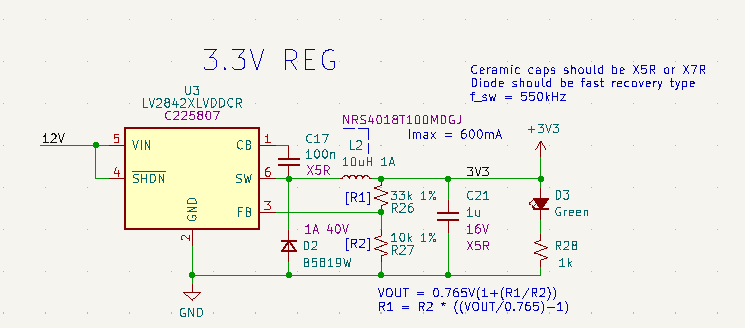
I opted for this second regulator rather than configuring the Si3404 to output 3.3V, so I can power external devices that might need a higher voltage.
Also I believe it helps with efficiency on the Si3404 to have it output a higher voltage.
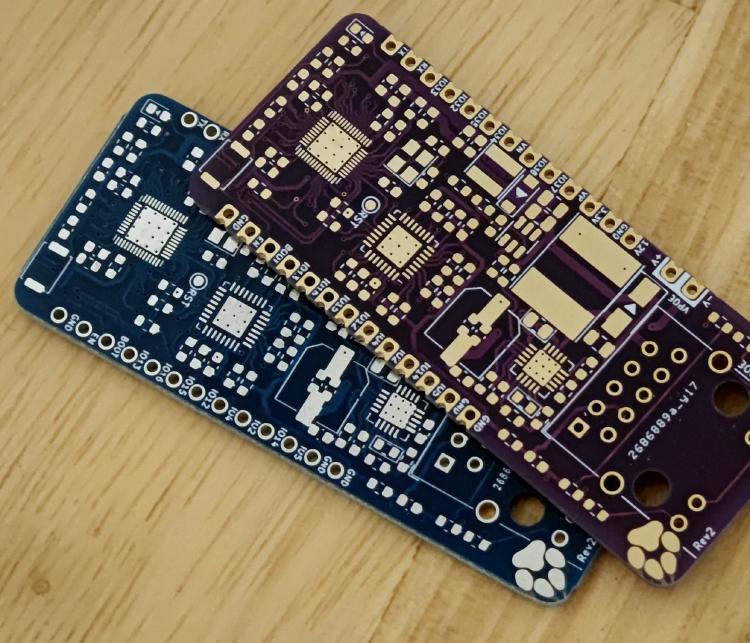
Assembly
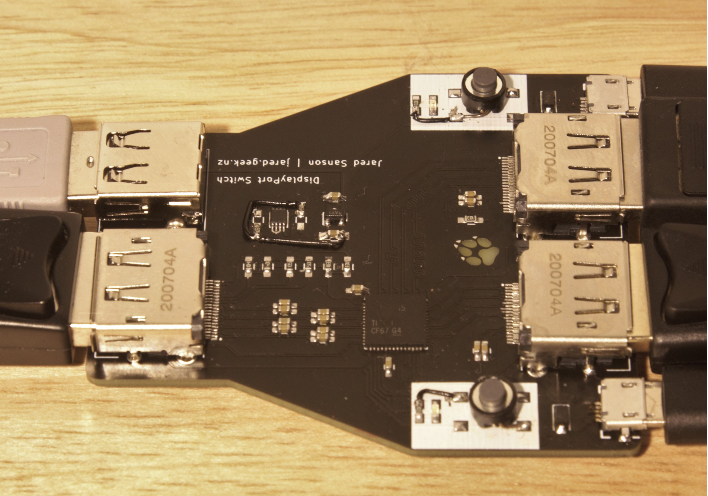
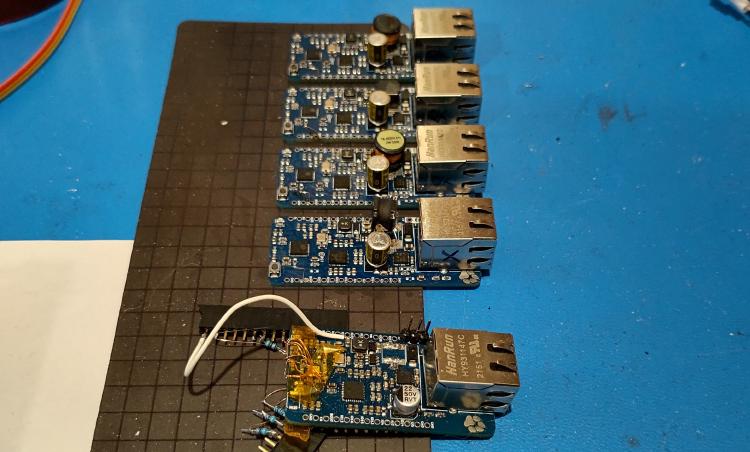
It took me 3 board spins to get things perfect, and it was great practice for me to get comfortable with stenciling and hot plate reflowing. Here are my final boards - one with castellated edge connectors, and one without:
Actually my first revision was the most painful - not only does the ESP32-U4WDH chip come in two core variants, but it also has a cursed not-quite-QFN32 package!! However I didn’t let my 1st rev go to waste, and practiced my bodge-wiring skill:
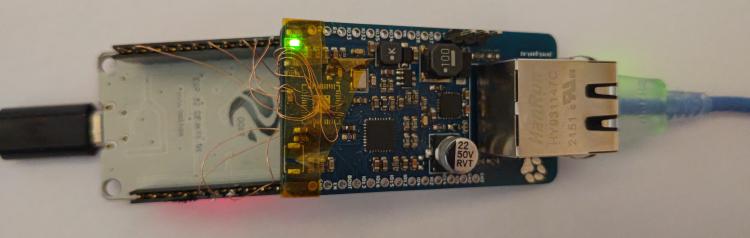
And yes, this worked! I was able to establish an ethernet link and reliably ping the device!
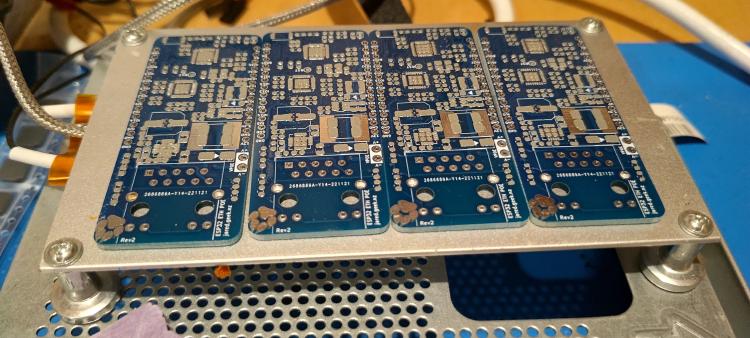
With many lessons learned, I ordered a second revision along with solder stencil, and started a larger run:
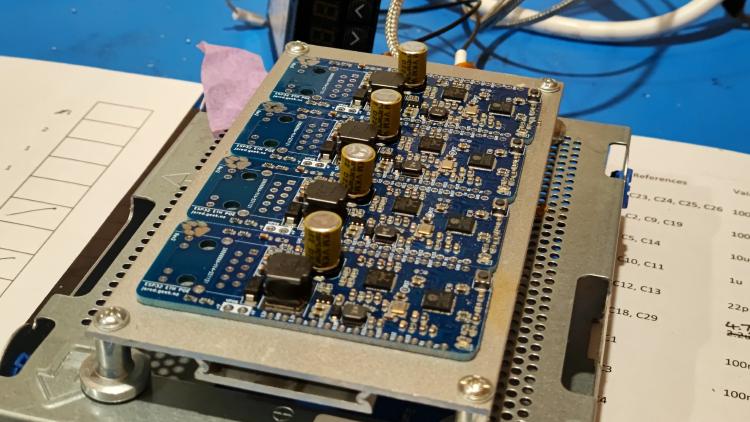
All assembled! And mostly working…
Firmware
I designed this board to be compatible with both Arduino and ESPHome, since the ESP32 libraries natively support the PHY in both frameworks.
ESPHome
For ESPHome, configuration is simple:
esp32:
  board: esp32dev

ethernet:
  type:     RTL8201
  mdc_pin:  GPIO23
  mdio_pin: GPIO18
  clk_mode: GPIO0_OUT
  phy_addr: 0

...
Actually at the time I designed this, ESPHome had a bug that prevented usage of GPIO0_OUT mode, which I submitted a fix for (#4307 ).
Arduino via PlatformIO
For Arduino, you must use at least Arduino Core 2.0 or higher, or ESP IDF v4 or higher.
main.cpp
void setup() {
    // WiFi antenna not available on this board
    WiFi.mode(WIFI_OFF);

    ETH.begin();
    ETH.config();
}
platformio.ini
[platformio]

[env:esp32_poe]
platform  = espressif32
framework = arduino
board     = esp32_dev
build_flags =
    -DETH_PHY_ADDR=0
    -DETH_PHY_MDC=23
    -DETH_PHY_MDIO=18
    -DETH_PHY_TYPE=ETH_PHY_RTL8201
    -DETH_CLK_MODE=ETH_CLOCK_GPIO0_OUT
If all goes well, you should see the Ethernet jack LED light up when it has an active link.
Wrapping Up
This will be my first documented ethernet project of many to come…
KiCad source files are available here:
https://github.com/jorticus/esp32-poe-dev
Let me know if you end up building this!
And if clones appear on AliExpress, my work here is done :)
Comments
Note: Comments have been migrated from Disqus to Remark42, a privacy-preserving comment system. (why?)
You can comment anonymously or log in via Github or Email.